Step 1: Thinking of what content is going to be re-used in multiple different courses
When creating templates in Unison, the best thing to do is to think of what pages are you going to be using over and over again. This could be things like an intro page that will be the same in every project, maybe the same course style that you want to use for every course or maybe you have the same pool of questions that you want used in your courses but just have them pulled in a random order.
I suggest that you first plan out and think of what you want in your courses that will be the same across the board. Even if you start from a template you can tweak content for each course as well without messing up the template so don't worry about that.
Got your content in mind? Good, for me I will just have a simple intro page and quiz page with a couple of questions.
Step 2: Create a new course
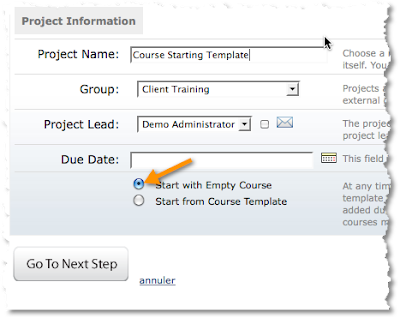
Start by creating a new course in Unison. Keep in mind that this will be your template so you do not want to create a full and detailed course, but just a course that will be your starting template for other courses. If needed you can tweak this template later so new courses you start can have the new changes.
In this case I am starting a course called "Course Starting Template". Since we have not saved any template yet I want to make sure "Start with Empty Course" is selected instead of "Start from Course Template". Once we have saved our template we will start other courses with the "Start from Course Template" option, for now we are just setting up our template.
Go onto the next step to pick your course style. Here is where you can pick the style of your course. The nice thing about setting up a course template is you can pick the style and every other time you start from this template that style will already be chosen. That way you can make sure if other people are starting courses that you are all creating a universal look and feel for all your courses.
For now I am just going to choose the "Deep Black" course style. The next step is to assign other people to this course. You can if you want but for now I am going to leave myself assigned and then go onto "Create My Project"
Once your project is created click on "Build/Modify the Course" to launch the course authoring tool.
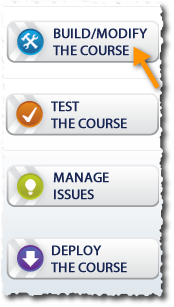 Once you have the course authoring tool launched, let's go ahead and go onto the next step.
Step 3: Building your re-usable pages
Keep in mind here that we are not building a course with this project, we are going to be building pages that will be re-used for other courses. So, just build the pages that you will use often in other courses. Keep in mind that when you start another course you can always delete the pages that do not apply for that particular course so go ahead and add any pages that may be used for more than one course.
I am going to build a text page for my intro since I will always have the same intro to my courses and a quiz page with some questions in it which I will set up to be pool of questions that will be randomly asked. Go ahead and build whatever pages you want. Keep in mind that the page names can be tweaked in each course, so for the template just keep it general.
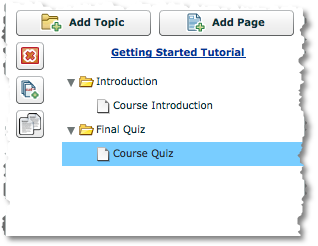
Now that you have your pages built we are ready to save this course as a template. Keep in mind that you just need to build the pages that will be used in other courses as well.
Step 4: Save your course as a template
Now is where the magic happens. Up on the top of your authoring tool there is a button that looks like this.
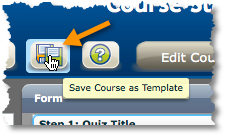 By selecting this option you will have the chance to save your course as a template. Once that button is clicked on you will be presented with this dialogue.
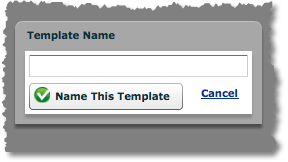 You want to make sure you name this template. This is the name that you will see when you start new courses. So give your template a name, I will be naming it "Course Starter" then select the "Name This Template" button.
 It will then save your template. It may take a few minutes depending on the size of your template.
 Once it is done saving you will see a yellow message at the top that says "Template Saved". Once that is done, do not start building a course in this template. You want to save this course just for tweaking your template and not for building an actual course. So close out of this course and go ahead and start a new project.
Step 5: Starting from a template
Now that you have your template set up, you can start any new course from that template. First start a new course:
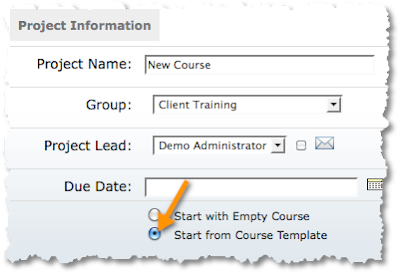 This time you want to make sure "Start from Course Template" is selected instead of "Start with Empty Course". Then select "Go To Next Step".
The next step will then take you to the list of course templates you have saved. Select the one you wish to start from and click on "Create My Project". Assign the people to your project and click on "Create My Project" again.
Once your project is created click on "Build/Modify" to launch the course authoring tool.
 Now that you have the authoring tool up you will notice your pages already created for this course and that they are currently identical to your template.
 The nice thing is you can start tweaking text, images, adding pages, deleting pages that don't apply for this course and this will not change your template.
This will help speed up development by allowing you to bypass creating the same pages for each course you develop.
Hopefully this tutorial will help you create your own templates and make your authoring process faster and easier. If you have questions or need additional info please leave your comments below or email us at support@rapidintake.com.

No comments:
Post a Comment