
1. After logging in, click on the "Admin" tab at the top right. Under the "Users" heading, click on the link labeled "Add a User."

2. Fill in the required information in each field and then select the level of the user (reviewer, developer, manager, or administrator) and click "Add User" at the bottom.

The new user can be seen if you click on "View/Update Users" under the "Users" heading.

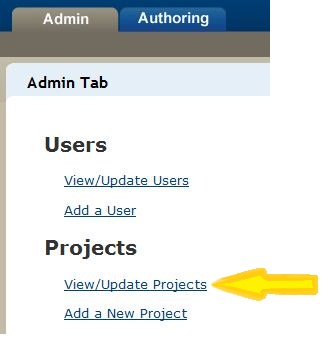
3. To add the new user to an existing project, click on the "Admin" tab. Click on "View/Update Projects" under the "Projects" heading.
4. Locate and click on the project in the list of project names.
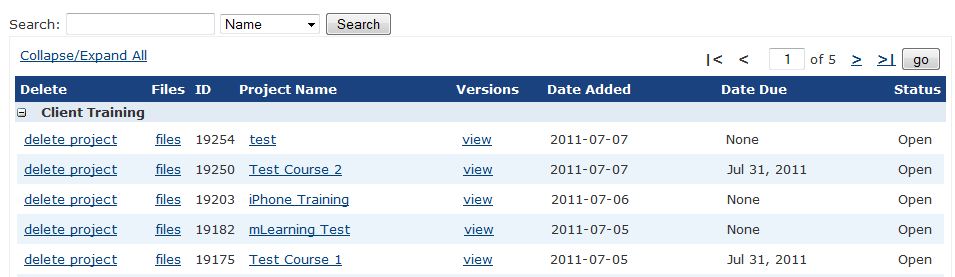
If you have a hard time finding your project, you can do a search for it if you know the name, ID, date added, or date due. Type in the name (or ID or a date) in the "Search" field and then use the pull down tab to select what type of information it is (name, ID, date added, or date due) and click on the "Search" icon.

5. Click on the project name in blue and underlined.

6. Locate the "assigned team members" heading on the left side of the screen.
 7. Click on the "add/remove" link that is blue and underlined to the right of the "assigned Team Members.
8. Locate the user you want to add on the "User List" on the left and click on the name.

9. After the user name is highlighted in blue, click on the two arrows (>>) to add the name to the list of "Users Currently Assigned."
10. When you have all the new users you want added to the "Users Currently Assigned" list, click on the "Finished" icon.
No comments:
Post a Comment